Console Emulation Station
How to build CES.
Hardware/Software
Hardware
CES uses Mac hardware, running OS X. It should use at least a 1Ghz G4, preferably faster to get maximum performance in all the emus. It also needs TV out of some sort (s-video, composite, etc, depending on what the TV supports).
Currently CES is using a G4 400Mhz that has been upgraded with a Giga Designs 1.1Ghz G4 CPU upgrade, has 640MB of RAM, an 80GB hard drive, and an ATI 8500 video card that uses S-Video out, running OS X Panther. In the future it will be tested out on the new Mac Mini, which looks like it could be the perfect vehicle for this project.
Lastly, a PS2 to USB adapter is needed to connect a PS2 controller to the Mac (right now only one controller can be used with CES, see "To Do" below for more info).
Files
Frontend code, preferences, graphics, etc to make CES do its thing. Most of it should be here, some may be missing. Emu's and other apps not included obviously. See below for those.
CES (12/17/05) http://www.brentgustafson.com/games/ces/ces.zip
OS/Apps
Apps needed to run the frontend, etc.
- Firefox - Browser, runs the frontend
- USB Overdrive - Used for controller keyboard mapping
- Shapeshifter - Changes OS chrome.
- Mighty Mouse - Changes mouse cursor (optional)
- Application Enhancer - Used with Shapeshifter and Mighty Mouse
- Super Get Info - Useful for looking up type/creator codes (optional)
Emulators
All of the emu's in CES. Links to download sites.
- Atari 2600
- Atari 5200
- Atari Lynx
- Gameboy/Gameboy Color
- Gameboy Advance
- Neo Geo Pocket Color
- Nintendo Entertainment System
- Super NES
- Sega Master System/Game Gear
- Sega Genesis
- TurboGrafx-16
- Vectrex
- Virtual Boy
Most of these emu's are Bannister's, so we also need Emulator Enhancer to make it all work.
- Emulator Enhancer
ROMs
ROMs need to be named like they are in the GoodTools database. Well, technically they don't but it makes it much easier (see below).
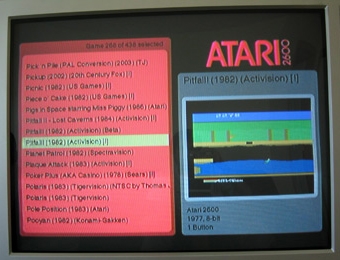
Screenshots
Screenshot Archive has a ton of console game screenshots set up already, all names with the GoodTools database namings. Download as many as you want/need. Not every screenshot is here, but it gives a nice start.
Setup
OS Install
Reinstall OS X and wipe the hard drive. Be sure to customize the install to not include the stuff you don't need (print drivers, extra fonts, iApps, etc).
Setup Directories / Software Install
Install Firefox, USB Overdrive, Shapeshifter, Mighty Mouse, Application Enhancer, Super Get Info, and Emulation Enhancer as their docs say to do.
The rest of the files and apps go into the Documents directory. It should have the following folders: console - The console folder from ces.zip. Drag and drop here if it's not already. There's a folder in here called "screens". Your screenshots go in that folder, and subdivided into folders based on each emu, named the same as the folders in your ROM directory (see below).
Emus - Put all of your emus here. One folder for each with the following:
- Boycott Advance
- Generator
- Handy
- Jum52
- KiGB
- Neopocott
- Nestopia
- SMS Plus
- SNES9X
- Stella
- TGEmu
- Vecx
- ViBE
ROMs - ROMs go here in directories for each system. This should have the same folder names as the Screenshots directory, named as follows:
- 2600Ren
- 5200Ren
- GBARen
- GBCRen
- GBRen
- GGRen
- LynxRen
- NESRen
- NGPxRen
- PCERen
- SMSRen
- SNESRen
- VBoyRen
- VectRen
Etc - OS and Graphics folders (and any other stuff you want) go in here. Start with this set of systems. To add more (or take out some) look down further on the page, it requires a bit of work.
Generate HTML
Once all the folders are created (with the right names), and the files are in place, its time to generate the HTML files that the frontend will use for each system. Go to Documents > console > build.pl and open the file. On line 13 is a path to the Documents folder. Be sure to replace "username" in this string with the username of the person logged in. Save the file.
Now open game.js. Line 10 has the same variable. Do the same thing as above, and save the file. Now we can generate the HTML. First however, double check that each folder in the "systemName" array inside game.js actually exists in the ROM directory, otherwise there will be errors. To add or subtract systems is a bit harder, and discussed later. Open the Terminal. Type: perl Documents/console/build.pl
If all goes well, all of the systems HTML should be written out into the console directory, with all of the games lists in them. If there's an error, check the folder names in the ROMs directory. To add additional games in the future, just add the ROMs to their given system directory in the ROMs folder and run build.pl again. It'll update the games list for each system (this can be done remotely if you allow ssh access to the Mac through the Sharing system prefs, discussed later).
Software Preferences
To make it easy to set the prefs for all the software, just take the preferences files out of the Etc > OS > prefs folder and put them into Users > Username > Library > Preferences.
For Firefox prefs, put the files from the Etc > OS > app support folder into Users > Username > Library > Application Support > Firefox > Profiles > default.xxx folder. This sets up a lot, but not all prefs.
Firefox Setup
Firefox needs a bunch of tweaks. First are two extensions that need to be installed:
- Things They Left Out - Lets you add new MIME Types for helper apps in Firefox (under Tools > More Options).
- AutoHide - Helps with "fullscreen".
Once these are installed, select Tools > Extensions > AutoHide > Preferences, and uncheck all boxes. Then go to the preferences in Mozilla and set the start page to be the start.html file in the console directory.
OS Preferences
First thing first, take everything out of the Dock and shrink it down as far as it can go. Also take everything off the Desktop so there's nothing on it. Now open System Preferences. Set the prefs like this (in Panther):
- Desktop & Screensaver - Set the Desktop to the ces.png from the os folder in the ces folder (wherever that is, probably the Documents folder). Make sure it fills the screen. Set the screensaver to Flurry (or whatever) and the timeout to 5 minutes. Saves the TV screen or it will burn in.
- Dock - Turn off magnification, and auto hide the Dock.
- Displays - Set the Display to 800x600. All of the graphics work only for this res (for now).
- Energy Saver - Turn it all off.
- Sharing - Turn on Personal File Sharing and Remote Login. Name computer "CES".
- Accounts - Under Startup Items, add Firefox.
- Software Updates - Turn off.
- USB Overdrive - This should have all the prefs for all the emus, etc, all ready set up (each emu should probably be launched once prior so it can recognize it as a trusted app). Simply turn it on.
- Shapeshifter - Under Themes, add CES.guiKit from the ces > os directory. Apply the changes, and make sure Shapeshifter is enabled. This turns all chrome black and is needed because Firefox cannot do true fullscreen on Mac, so this fakes fullscreen.
- Mighty Mouse - Import the cursor set in the ces > os folder called My Cursor Set.MightyMouse, and set the cursors. This turns the cursor into a small grey dot (optional, can be as a last step)
Now open Firefox (use the Finder in the dock), and do View > Fullscreen. The menubar is still up top, it's just black. Click around to find it. Now quit Firefox. Restart the computer. If all went well, it should be good to go!
Usage/Maintenance/Etc
Using CES
After boot, the CES frontend will show up. It will always default to the last game you played, so if you're trying to just get through, say, Final Fantasy, you can get right into it again.
The first thing you want to do when you see the frontend is hit Up/Down/Left/Right on the control pad. There's a bug in USB Overdrive and it seems to need to have all four directions hit before it works properly, otherwise the game list will seemingly scroll on its own.
Using the frontend is fairly easy. Up/Down moves up and down in the game list. Left/Right does a page up/down in the game list. To select a different system, use the shoulder buttons on the top of the PSX controller. This cycles through each system, where you can select any of the games. To start a game, press the Start button on the controller.
The game should load in the appropriate emu and you should be able to play it just like any other game with the controller. When you're done, to quit and go back to the frontend, simply hold down the Select button and press Start at the same time. This will quit the emu and let you select another game to play.
The only exception to this at the moment is SuperNES. Unfortunately there's no way to quit while you're playing a game in this emu (if you'd like to bug the author of SNES9x about fixing this, feel free! :), thus you need to hit L2 to quit the emulation. This will show you the frontend, however, SNES9x is not quit. Then you can hit Select+Start to quit and go to the frontend. It's very confusing, but if you ever see the frontend and can't scroll around, most likely SNES9x is running, so just Select+Start to quit it and go back to selecting a game like normal.
When you're done with the system in general, just hold down the power button on the Mac to do a hard shutdown. I've done this hundreds of times, and with Journaling enabled in the OS, it's never been a problem.
Adding/Subtracting emus
This part is very hard and really gets into the meat of how this thing works. As such I don't have the time at the moment to explain it all, but it can be figured out if you study the code and how it's all doing what it does. Subtracting is easier than adding (for instance, you need to modify build.pl and game.js to subtract systems, to add, you need to modify just about everything on the system). I hope to add to this information in the future, but for now, you'll need to add all the emus listed above for this to work, no more, no less.
Emu Video/Interface Prefs
Here are the prefs to set in each emu (for Emulator Enhancer). Every emu has to be set individually.
Video
- Frame Rate = 60fps
- Synch Video = Checked
- Effect Size = 1x
- Effect Type = Plain
- Auto Fullscreen = Checked
- Aspect Ratio = 4:3 (Uncorrected for any handhelds!)
Interface
- Run at Actual Speed = Selected
- Prioritize Speed over Smoothness = Checked
Emu Keyboard Layout
Here is the keyboard layouts and how the map the the controller for each player using Controllermate
Player 1
- Up = R
- Down = F
- Left = D
- Right = G
- Select = Z
- Start = X (1 in Firefox)
- Triangle = L
- Square = J
- X = Return
- O = K
- L1 = E
- R1 = T
Player 2 (all keyboard keys are on the numpad)
- Up = 8
- Down = 2
- Left = 4
- Right = 6
- Select = =
- Start = Enter
- Triangle = -
- Square = *
- X = /
- O = +
- L1 = 0
- R1 = .
To do's
- Add info on adding/subtracting emus. ;)
- Add support for 640x480.
- Get the SNES9x creators to enable quitting while playing the emu.
- Enable 2 player support. Right now 2 players is basically impossible because USB Overdrive will not allow multiple devices in use at the same time. When they update their software (which could be years from now) to allow this, I'll add it in.
- Keep bugging the Mozilla group to add true fullscreen to Firefox...or keep bugging Apple to add application launching without redownloading of the file for Safari. Either one is fine by me. ;)
New Ideas
(These use the new CES based on Safari)
- Require user to install in Apps directory. This shouldn't be an issue.
- Create an Applescript with the "do shell" command to run build.pl to update the roms.
- You'll know where it is because it will always be in the apps directory. Easy to use interface then, double click and give people a success or fail message.
- Create a form page in HTML that lets people add in their emulator and screenshot directories.
- Use JS to keep track of values
- Bring it up by pressing P key in CES
- Values you can add
- Select sytem (pulldown)
- Rom path (browse button)
- Screenshots path (browse button)
- Image format (radio buttons, PNG, JPEG, GIF)
- Up/Down arrows to change order
- +/- buttons to add or subtract an emu
- When you submit, it gives you code on the page, that the user can copy and paste into the build.pl file.
- Less errors, easier to set up, but can't read old config, must redo each time.
- Possible to have user save the info to its own config file, then let JS load that doc into a hidden iframe, and parse the contents (say, "::" delimited file) to re-read the old config.
- See if you can't have the user make thier own config file, and just read it into the perl script, delimited (see above) and then parse those values into global variables for use in the perl script.
- You can just put each value for each system on one line, then do a foreach in the perl script and run it that way (number of lines, means number of systems). This should easily lighten your load, and you can cut out a lot of the guessing what system is what in the perl script (and the looping should be easier).
- As a note, you still need TinkerTool to turn off font smoothing.